


Table of Contents
- Understanding Horse Training Aids and Their Purpose
- Common Types of Training Aids and When to Use Them
- Horse Training Aids for Groundwork and Lunging
- How to Fit Horse Training Equipment Correctly
- Horse Training Aid Safety: Welfare and Warning Signs
- A Decision Framework for Choosing the Right Aid
- Frequently Asked Questions
Last Updated: October 11, 2026
Understanding Horse Training Aids and Their Purpose
Horse training aids are tools designed to support communication between rider and horse during training and riding. They help establish correct movement patterns, improve headset and frame, and build strength in specific areas.
Training aids fall into two main categories: natural aids and artificial equipment. Natural aids include your hands, legs, seat, and voice, the tools you already have.
The goal of any training aid is to teach your horse something new or reinforce existing training. A well-chosen aid makes the learning process clearer for your horse.
Natural Aids vs. Artificial Training Equipment
Natural aids are your foundation. They're what every rider uses, and they're always available. Your hands communicate through the reins. Your legs apply pressure to direct movement.
Artificial training aids supplement natural aids. They don't replace them, they clarify your message. A side pull offers an alternative to a bit for sensitive horses.

The key difference is this: natural aids require skill and timing. Artificial aids can make your message clearer when used correctly, but they can also mask poor technique if misused.
Common Types of Training Aids and When to Use Them
Understanding your options helps you match equipment to your actual training goal. Different aids serve different purposes. Some work on the ground. Others work under saddle. Some are better for young horses. Others suit rehabilitation or retraining.
Rein-Based Aids for Headset and Frame
Draw reins and training forks are the most common rein-based aids. They're designed to help a horse develop a correct headset and engage their core.
Draw reins attach to the girth or saddle and run through the bit. The Royal King Leather Pulley Draw Reins use a pulley design that allows the reins to slide smoothly, distributing pressure evenly.

Training forks (also called training forks or head poles) attach to the noseband and encourage the horse to lower their head and round their back.
These aids work best for horses with some training foundation. Young horses or those new to ridden work often need simpler, more direct communication first. Always start with a professional present.
Side Pulls and Bitless Alternatives
Side pulls offer an alternative to bitted bridles. They apply pressure to the sides of the horse's face rather than inside the mouth. The Tough1 Harness Leather Rolled Side Pull uses premium oiled leather with rolled noseband for comfort.
Side pulls are particularly useful for:
- Young horses learning basic steering and stopping
- Horses with sensitive mouths or previous bit-related problems
- Bitless riding for trail or light work
- Building confidence in inexperienced riders
The advantage is gentler communication without bit pressure. The limitation is reduced refinement compared to a well-fitted bit and experienced hands. Side pulls work best with steady, consistent pressure rather than the nuanced communication a bit allows.
Horse Training Aids for Groundwork and Lunging
Lunging is one of the most effective training tools available. It builds fitness, teaches obedience, and allows you to observe movement without the weight of a rider. Proper lunging equipment makes this work safer and more productive.
Lunging systems include a lunge line, lunge cavesson or halter, and sometimes side reins or chambon equipment.
Lunging works best for:
- Building fitness and muscle development
- Teaching obedience to voice commands
- Evaluating soundness and movement
- Exercising horses when riding isn't possible
- Settling anxious or energetic horses
The key to safe lunging is proper setup. Your horse needs a properly fitted halter or cavesson. The lunge line should attach at the center of the head, not to the side.
How to Fit Horse Training Equipment Correctly
Proper fit determines whether an aid works as intended or causes problems. Ill-fitting equipment can pinch, rub, restrict movement, or apply pressure in wrong places. Taking time to fit your equipment correctly prevents discomfort and improves results.
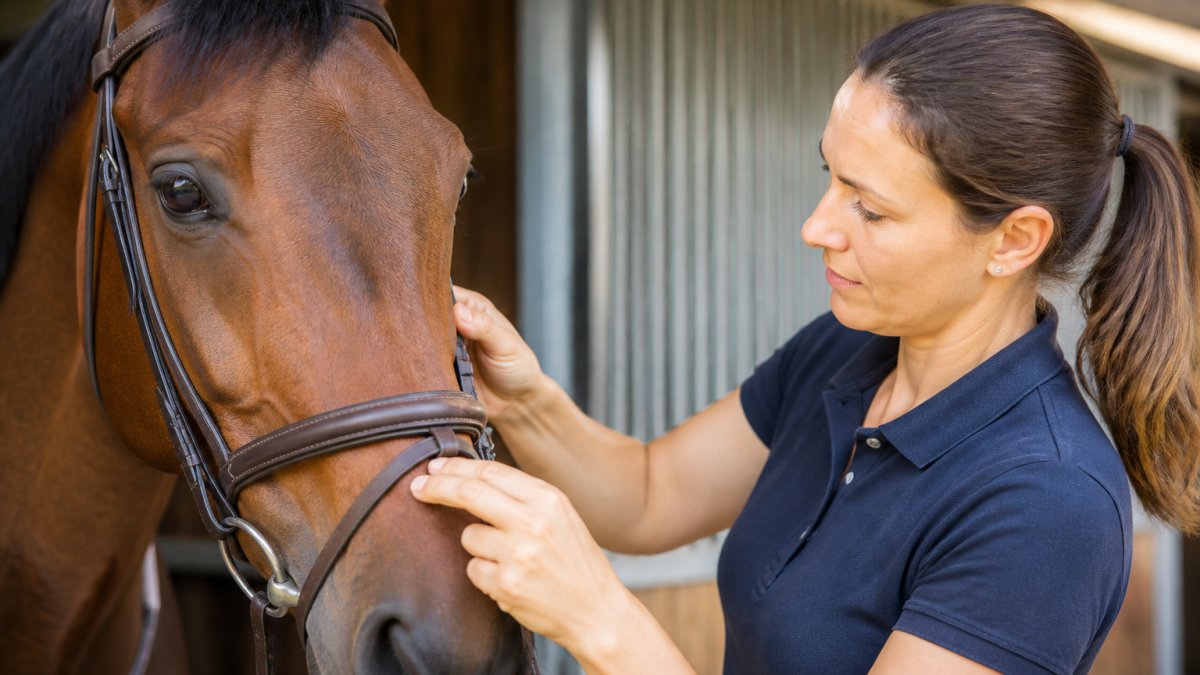
Measuring and Adjusting for Your Horse
Start by measuring your horse's head. Most training aids come in standard sizes (small, medium, large) or with adjustable straps. Measure from the cheek to cheek across the widest part of the face. Measure the length of the face from the corner of the eye to the corner of the mouth.
When the equipment arrives, check the fit before first use:
- The noseband should sit about two fingers below the cheekbone
- Straps should not pinch or rub the skin
- You should fit one or two fingers under any strap when fastened
- The equipment should not interfere with the horse's ability to eat or drink
- Movement should be unrestricted
Adjust straps as needed. Most leather equipment has multiple holes for fine-tuning. Start loose and tighten gradually. A loose fit is always safer than a tight one when you're learning.
Royal King - Leather Pulley Draw Reins →
Progressive Introduction and Monitoring
Never introduce new equipment at speed or under stress. Start in a controlled environment. Let your horse wear the equipment while standing still, eating, or walking in hand. This builds familiarity.
Progress in stages:
- Walk in hand with the new aid (5-10 minutes)
- Walk under saddle or on a lunge line (10-15 minutes)
- Move to trot if the horse is calm and responsive
- Add canter only after several sessions at walk and trot
- Always work with an instructor or experienced handler present
Watch your horse's behavior closely. Ears pinned back, tail swishing, or resistance to forward movement can signal discomfort. Stop and check the fit. A horse should move freely and calmly in new equipment, not fight it.
Horse Training Aid Safety: Welfare and Warning Signs
Equipment is only as safe as the hands using it. Even the best-designed aid can cause problems if misused. Understanding welfare concerns and recognizing warning signs protects your horse.
Common mistakes that harm horses:
- Using draw reins with a heavy hand or constant pressure
- Leaving equipment on too long (more than 30-45 minutes at a time)
- Using aids on horses not ready for them (too young, too green, or unsound)
- Ignoring signs of discomfort or resistance
- Using equipment to mask training problems instead of fixing them
Watch for these warning signs:
- Head tossing, tail swishing, or pinned ears
- Resistance to forward movement or refusal to move
- Excessive sweating or muscle tension
- Change in behavior (spooking, aggression, or shutdown)
- Visible marks, rubbing, or hair loss where equipment contacts skin
- Reluctance to be caught or tacked up
- Changes in eating, drinking, or sleeping
If you see any of these signs, stop using the equipment immediately. Check the fit. Consult your veterinarian if the problem persists. Some horses develop legitimate physical or behavioral issues with certain aids. That's not failure, it's information.
A Decision Framework for Choosing the Right Aid
Choosing the right training aid requires thinking through your horse's specific situation, your training goal, and realistic alternatives. A systematic approach to how you choose horse training aids prevents expensive mistakes and improves results.
Assessing Your Horse's Age, Experience, and Fitness
Start here. Your horse's stage of development determines what aids make sense.
Young horses (under 4 years old):
- Need basic training first (walk, trot, canter, steering, stopping)
- Benefit most from simple, clear communication
- Often do better with natural aids and basic equipment like side pulls
- Not ready for complex aids like draw reins or advanced lunging work
Experienced horses with training gaps:
- May benefit from targeted aids that address specific problems
- Often respond well to draw reins if they've had good basic training
- Can handle more sophisticated equipment if introduced properly
- Benefit from professional assessment of what's actually missing
Horses in rehabilitation or returning from injury:
- Need veterinary clearance before any training work
- Start with groundwork (lunging, in-hand work) before ridden work
- Progress slowly, watching for signs of soreness or resistance
- May need specialized equipment (therapeutic aids) based on veterinary recommendation
Fitness level matters too. An unfit horse can't use new equipment effectively. Building general fitness through walking, trotting, and lunging should come before introducing specialized aids. A fit horse learns faster and handles new equipment better.
Matching Equipment to Your Training Goal
Define your goal clearly. This determines which aid makes sense.
| Training Goal | Best Equipment Options | Why This Works |
|---|---|---|
| Improve headset and frame | Draw reins, training fork | Creates downward pressure that teaches engagement |
| Alternative to bit | Side pull, bitless bridle | Gentler pressure for sensitive horses or behavior issues |
| Build fitness and obedience | Lunging system, lunge line | Ground work strengthens muscles and teaches response to voice |
| Teach lateral movement | Side reins on lunge line | Encourages bend and balance at walk and trot |
| Strengthen hindquarters | Draw reins, lunging | Both encourage engagement and weight shift to back legs |
Be honest about what your horse actually needs. Many training problems come from rider technique or insufficient basic training, not equipment. Adding an aid doesn't fix a broken foundation. It only works when the foundation is solid.

When to Skip the Aid Altogether
Sometimes the best choice is no aid at all.
Skip the aid if:
- Your horse responds well to natural aids and basic equipment
- The problem is rider technique, not horse training
- Your horse shows anxiety or resistance to new equipment
- You don't have professional supervision available
- Your horse is very young, unsound, or recovering from injury
- You're considering an aid out of frustration rather than a clear training plan
Many excellent horses never need specialized training aids. They learn from consistent, clear communication and good horsemanship. An aid should enhance your training, not become a crutch. If you're not sure whether you need it, talk to an instructor or trainer before investing.
Choosing the right training aid takes assessment, planning, and professional input. Air Capital Tack carries a carefully curated selection of quality training equipment from trusted brands, including draw reins, side pulls, and lunging systems.
Frequently Asked Questions
What are horse training aids used for?
Horse training aids are tools designed to help communicate with your horse and support specific training goals. They assist in developing correct headset, frame, and movement patterns, and can help during rehabilitation or when introducing young horses to ridden work. The right aid acts as a temporary teaching tool that encourages the horse to engage muscles correctly and respond to subtle rider cues. Most aids are meant to be phased out once the horse understands the desired response.
How should horse training equipment be fitted to avoid discomfort?
Proper fit is critical to safety and effectiveness. Measure your horse's head and neck carefully before purchasing, and always follow the manufacturer's adjustment guidelines. Check that the equipment sits in the correct anatomical position without pinching or rubbing. Start with loose adjustments and gradually tighten only as needed. Watch your horse's response closely: ear position, tension in the jaw, and smooth movement indicate good fit. If your horse shows resistance, head tossing, or gaping mouth, the fit or adjustment needs revision.
Are horse training aids suitable for beginners?
Training aids can be helpful for beginner riders, but only with proper guidance. An instructor should assess your horse's needs and demonstrate correct use before you ride independently. Many beginners benefit from simpler aids like side pulls or training forks, which offer clearer communication than complex systems. Avoid advanced aids if you lack experience, incorrect use can confuse or frustrate your horse. Starting with natural aids and basic groundwork often teaches better fundamentals than jumping straight to equipment.
When should I stop using a training aid?
Discontinue an aid once your horse consistently demonstrates the desired behavior without it. This typically takes weeks to months, depending on the aid and your horse's learning speed. Gradual reduction works better than abrupt removal: loosen adjustments incrementally, use the aid only for specific exercises, then transition to natural aids alone. If your horse regresses when you remove the aid, you may have moved too quickly. Work with an instructor to determine readiness, and always prioritize your horse's understanding over rushing to eliminate equipment.


